 Latest images
1990 Eagle Talon TSi AWD
4 posters
DSM Hangout :: ZEEE DSM HANGZOUT! :: Members :: Showroom
Page 2 of 2
Page 2 of 2 • ![]() 1, 2
1, 2
![]()
 Re: 1990 Eagle Talon TSi AWD
![]() marco Sun Jun 12, 2011 12:15 pm
marco Sun Jun 12, 2011 12:15 pm
CaffeineTripp wrote:Never mind, I'll keep the 40 degrees. lol Rather have that than the heat, especially with no air conditioning anywhere and working in a kitchen. I checked to see if they made one for a Mark, but nothing. Looks like they mostly deal with import cars rather than domestic, though, there's a lot of Chev SBs and BBs on there.
Oh come on! You know you want the 98* feels like 105*+! I am about ready to move to Northern Michigan, not joking either! For an aftermarket radiator I'll have to get a griffin or something.
Have you heard from Ben? He's not been around and I don't use Facebook even though I made an account!

marco- Member
- DSM Dedication. : 4924
Join date : 2011-02-08
Location : Hell
![]()
![]()
Re: 1990 Eagle Talon TSi AWD
![]() CaffeineTripp Sat Jun 18, 2011 7:29 am
CaffeineTripp Sat Jun 18, 2011 7:29 am
Not sure where he's been. Not to say that I've been on that often so far. Oh, side note, found a lower radiator support bushing somewhere. I think it was ExtremePSi. Genuine Mitsu part as well. Good stuff. Dropped in nice and easy.
CaffeineTripp- Member
- DSM Dedication. : 4900
Join date : 2011-02-09
Location : Duluth, MN
![]()
![]()
Re: 1990 Eagle Talon TSi AWD
![]() marco Sat Jun 18, 2011 12:06 pm
marco Sat Jun 18, 2011 12:06 pm
I lost those bushings for the Lincoln and stole a set from a mustang. At least you got the correct part!
marco- Member
- DSM Dedication. : 4924
Join date : 2011-02-08
Location : Hell
![]()
![]()
Re: 1990 Eagle Talon TSi AWD
![]() CaffeineTripp Tue Jun 21, 2011 5:20 am
CaffeineTripp Tue Jun 21, 2011 5:20 am
Got the new plates in for the car. TSI AWD. Woo! Custom plates.
CaffeineTripp- Member
- DSM Dedication. : 4900
Join date : 2011-02-09
Location : Duluth, MN
![]()
![]()
Re: 1990 Eagle Talon TSi AWD
![]() marco Tue Jun 21, 2011 12:15 pm
marco Tue Jun 21, 2011 12:15 pm
CaffeineTripp wrote:Got the new plates in for the car. TSI AWD. Woo! Custom plates.
Cool, wonder if you could get one that AWD SPYDR?
marco- Member
- DSM Dedication. : 4924
Join date : 2011-02-08
Location : Hell
![]()
![]()
Re: 1990 Eagle Talon TSi AWD
![]() CaffeineTripp Thu Jul 07, 2011 5:53 pm
CaffeineTripp Thu Jul 07, 2011 5:53 pm
H'okay, so, got the springs swapped onto the new GR2s, but for some reason the driver's side CV won't pop into place. Wonderful. Got all ready to drive the car today with the new front struts in, but to no avail. Just going to bite the bullet and swap out the CVs, lower control arms and the sway bar end links. Get the whole front suspension taken care of. Even might get some prothane sway bar bushings while I'm at it just to keep everything up front stiff then work on the rear when I get the chance.
CaffeineTripp- Member
- DSM Dedication. : 4900
Join date : 2011-02-09
Location : Duluth, MN
![]()
![]()
Re: 1990 Eagle Talon TSi AWD
![]() 1gdsmftw Fri Jul 08, 2011 1:42 am
1gdsmftw Fri Jul 08, 2011 1:42 am
if u dropped 2 inches ur probably going to need a camber kit

1gdsmftw- Admin
- DSM Dedication. : 5074
Join date : 2011-02-07
Location : antioch tn -

![]()
![]()
Re: 1990 Eagle Talon TSi AWD
![]() CaffeineTripp Fri Jul 29, 2011 5:13 am
CaffeineTripp Fri Jul 29, 2011 5:13 am
I got the rear camber kit for it already. Yeah, anything below 1.5" we need a camber kit for it, sucks, but it's better than chewing through tires. I got the Whiteline Camber Kit, which also fits the GVR4. Seems like pretty sturdy construction; thick steel tubes, good construction on the poly bushings. Two in the kit, think it cost me around $90 for it. I'd rather have the Ingalls rear kit, but that was double the cost, and I've heard good things about kits like these that just have the bushings itself (much like the DME kit that's still on back order). Gave Whilteline a shot and we'll see how she does once I get it all put together and aligned.
CaffeineTripp- Member
- DSM Dedication. : 4900
Join date : 2011-02-09
Location : Duluth, MN
![]()
![]()
Re: 1990 Eagle Talon TSi AWD
![]() CaffeineTripp Wed Aug 03, 2011 7:31 am
CaffeineTripp Wed Aug 03, 2011 7:31 am
Changed out the clutch slave cylinder today. Still needs a bit of a bleed, but boy does she shift better. Also, I ordered VS Speed Factory's FMIC. I hope it's not on backorder, be nice to get it installed soon! Apparently it's a really great fit, minus a smaller alternator belt, though not a big deal at all. Only heard good things about the kit. It was between the VRSF, Punishment Racing, and Godspeed's FMIC kits. Picked the cheapest, though one of the best.
CaffeineTripp- Member
- DSM Dedication. : 4900
Join date : 2011-02-09
Location : Duluth, MN
![]()
![]()
Re: 1990 Eagle Talon TSi AWD
![]() CaffeineTripp Wed Nov 16, 2011 9:25 am
CaffeineTripp Wed Nov 16, 2011 9:25 am
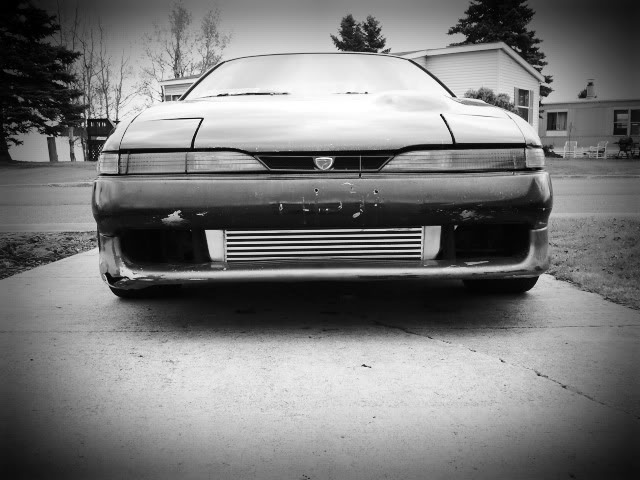
And there's the VR Speed Factory FMIC all done and ready. Sorry it took me so long to get a picture up, but there it is. Also, I didn't (shaaame) do a write up of everything. But for the most part, it's pretty self explanatory.
Cost: $325.00 Including Shipping (Did not purchase J-Pipe through VR Speed Factory)
Difficulty: 3/5
Time Required: 2 - 3 Hours
Tools Required: Basic hand tools, Dremel/Die Grinder, Drill with various bits, Tap and Die kit
Equipment: VR Speed Factory 1G Front Mount Intercooler kit (with or without J Pipe), gasket material, J Pipe gasket, BOV gasket, RTV, 36"-37" alternator belt.
Step 1: Remove Power Steering Cooler Lines (they run in front of the radiator).
Step 2: Remove alternator belt and push alternator towards the firewall (now would also be a good time to clean up that rust corroded, oil and dirt filled alternator adjusting bolt).
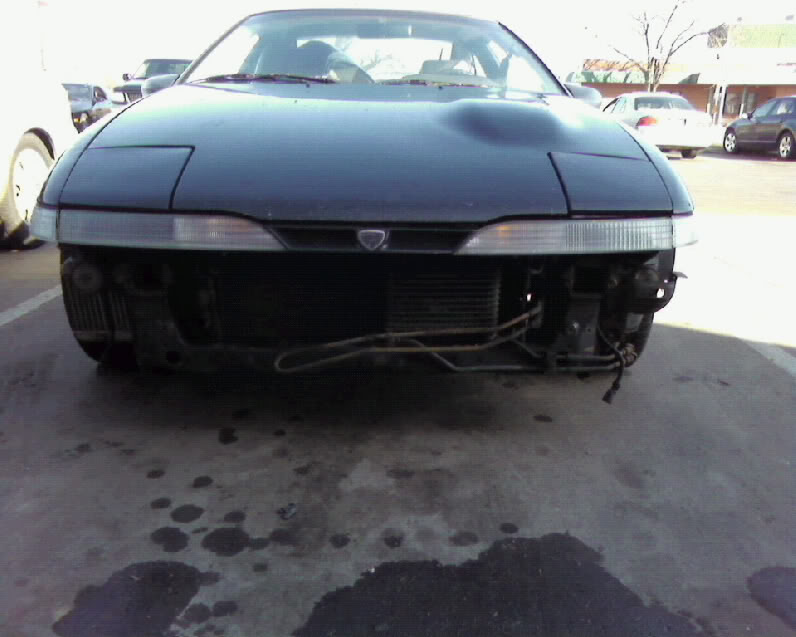
Step 3: Remove headlights, grill (for us 1GA guys), sidemarkers, header panel bar (which runs from the hood release latch downward) front bumper cover, and crash beam (I don't have a crash beam, so that's negated
Step 4: Remove OE intercooler piping, J Pipe, Throttle Body Elbow, and SMIC. There are three bolts on the SMIC; two are rather visible, the third is not.
Step 5: Position the intercooler at the front of the vehicle mocking up the location where you will have to cut the header panel. Using a permanent marker, stencil out where you need to cut using the Dremel/Die Grinder. It would be helpful to have a two friends hold the intercooler while you position it, but if need be, thighs do a good job of holding the intercooler.
Step 6: Cut out the parts of the header panel where you marked. The passenger side cold side piping coming off of the intercooler should point upwards more (thus having to cut out a different portion of the header panel) than the hot side intercooler pipe.
Step 7: Once the intercooler fits snugly through the holes that you have cut out (remove the coolant resevoir and position it aside), make sure the intercooler itself is level across, then mark holes on the left and right tabs (center tab too if you've got the header bar), and drill them out. I can't remember what size I drilled mine, but I know I didn't have a bit big enough so I had to tap the hole. In any case, it's easy to figure out if you've got the tap and die set, so have at it!
Step 8: Mount the intercooler to the crash bar mount.
Step 9: Remove the throttle body from the intake manifold as now would be an excellent time to clean it out. Make Throttle Body gaskets and use RTV to ensure a complete seal. Using the bolts and stud provided, mount the throttle body back in it's original position, attach the VRSF Throttle Body Elbow (may not clear for you ABS guys). Bolt everything together.
Step 10: Fab up the intercooler piping so you know what position it has to be in for future reference as the curved silicone couplers can be a pain in the ass to twist once connected to the intercooler.
Step 11: If your J Pipe didn't have a boost source welded onto it for your MBC, like mine, just bring it to your local weld shop and have them put one on. Shouldn't cost much. Or, you can do what I did, tap and die the J Pipe and toss in a bleeder valve (or something to that effect) don't forget to put threadlock on the threads.
Step 12: After everything is done and fabbed up to fit snugly, begin tightening all of the T-Bolt clamps.
Step 13: Put the BOV, intake pipe, and reconnect any connections that may have been removed along with vacuum lines.
Step 14: Put on the new alternator belt. It will be hard to get over the alternator pulley (but if you've got an underdriven alternator pulley, it'll be easier).
Step 15: Double check all of the T-Bolt clamps, connections to the Throttle Body and MAF, vacuum lines, etc. Wait approximately half an hour for everything to dry (if you used the RTV and the threadlock).
The Gain: Besides the obvious of having a better performing vehicle by keeping the intake temperatures down, and better flow throughout the intake system, you get a great looking front end, a very audible turbo spool, and a happy vehicle.
Suggestions: I'd highly recommend purchasing the VRSF J Pipe as well. No, it doesn't come with an MBC boost source, but that can be easily remedied by doing what I did or bringing the J Pipe to a body/auto shop to get a nipple welded on. It will keep the entire kit looking clean instead of having a mismatched part.
I wasn't too happy with the build quality, but the kit is a major step up from OE SMIC and rubber piping (minus the DeJon Tool UICP); there were aluminum chunks left on the interior of the UICP, the stability of the FMIC mounting flanges on the left and right do not seem strong, though the FMIC is light, they are quite bendable by hand, even so, I believe they'll do fine. Can always make a mount for the bottom part of the FMIC.
The Throttle Body Elbow was welded in an incorrect position, as per the OE throttle body mount. Still fit just fine though, just a little goofy looking.
Overall though, this kit is worth the money. Definitely worth the money. The guys at VRSF are very prompt in letting you know what's going on and answering any questions that you may have. The shipping company who VRSF was going through lost all of the FMIC kits. So they refunded us all shipping charges for it taking so long. No big deal. I also got an extra set of T Bolt clamps as well (8 used, 8 left over, 16 total).
CaffeineTripp- Member
- DSM Dedication. : 4900
Join date : 2011-02-09
Location : Duluth, MN
![]()
![]()
Page 2 of 2 • ![]() 1, 2
1, 2
![]()

 Similar topics
» my 1990 gsx
» 1990 Mitsubishi Eclipse GST
» Resurrecting my 1990 talon awd
» 1994 Talon
» Track Bound Talon of a DD
» 1990 Mitsubishi Eclipse GST
» Resurrecting my 1990 talon awd
» 1994 Talon
» Track Bound Talon of a DD
DSM Hangout :: ZEEE DSM HANGZOUT! :: Members :: Showroom
Page 2 of 2
Permissions in this forum:
You cannot reply to topics in this forum|
|
|